
I’ve wanted to post a pizza recipe for a while and I have some notes and photos with a dough enriched with grains but I’m not happy enough with it yet. While I’ve been perfecting the pizza recipe, I’ve also been perfecting the dough and loaves. Since posting my first bread recipe, I’ve tried to make the process a little less haphazard and to measure things out more carefully. I’ve also decided to try making the dough using only all purpose flour and, to my surprise, the dough behaved differently enough after the chilling period to warrant its own post. It is much stickier and much harder to work with than the light whole wheat dough. The directions here take this into account.
Also, I finally overcame my brutish ways and started to use parchment paper rather than plopping the dough from a cutting board into my palm then into the preheated pot. I cut the parchment paper to fit on the bottom of the cast iron pot uncrinkled. It helps to trace the bottom of the pot on parchment paper before cutting it. I let the dough rest on the parchment paper and then transfer the dough, parchment paper and all, into the pan once it is preheated. I have a 9-inch cast iron dutch oven with lid and the diameter of the parchment paper is around 6.25″. If you’re also using a small pot like mine but want to use a whole one pound of dough for the loaf, you might want to append two tabs to the parchment paper circle to help you lift the rested dough into the pot better.
I think that I tend to overbake my bread because I like the crust to be very crispy. If you’re not a crisp-fanatic like me, check out the notes about timing in the tips section.
Low-sodium dough
Adapted from Jeff Hertzberg and Zoë François’ The New Artisan Bread in Five Minutes a Day
Makes enough dough for about 4 small loaves of bread
Ingredients
-
- 680 grams (1lb 8oz) lukewarm water (100°F or below)
- 9 grams (0.32oz) of dry yeast (1 packet)
- 930 grams (2lb 0.8oz) all purpose flour
- 9 grams (0.32oz) sea salt (optional, see tips below)
Directions
- Pour the water into a large container with a capacity of at least 7 quarts. I sometimes use a 7.5-quart stainless steel roaster, other times a crock pot. Sprinkle the yeast over the water and let sit while measuring out the flours and salt.
- Pour the flour and salt over the water mixture. With a wooden spoon, mix until the ingredients begin to combine and the dough becomes scraggly. Reach in with wet hands and gently mix until all of the flour is incorporated, there are no dry patches, and the dough is uniformly moist. Make sure not to knead or pinch too much. You might need to keep wetting your hands if the dough is too sticky. If that’s the case, be careful not to introduce too much extra water. Use only as much as you need to get rid of the dry patches.
- Cover the container with a lid that is not airtight (or loosely with plastic wrap). Allow the dough to rest at room temperature until the dough rises and collapses or flattens on top, around 2-3 hours.
- After the rising period, move the container to the fridge. Store the dough in the fridge with the lid that is not airtight (or loosely covered) for up to 14 days.
- The dough can be used right away after the initial rising period but it is very sticky and difficult to work with. It is easier to work with it after it is refrigerated overnight.
Process photos
See process photos on the older bread recipe post.
Low-sodium bread
Adapted from Jeff Hertzberg and Zoë François’ The New Artisan Bread in Five Minutes a Day
Makes a small loaf
Ingredients
-
- flour, for dusting
- a 1-pound piece of dough, recipe above
Directions
-
Prepare surface
Cut out a piece of parchment paper that is approximately 7″ in diameter or, if using a dutch oven that has a flat surface smaller than 7″, trace the bottom of your pot and append two tabs to the parchment paper circle to help you lift the rested dough into the pot better. Place the parchment paper onto a clean surface.
-
Form dough into a loaf
Dust your hands with flour. Pull out a 1 pound (grapefruit-sized) piece of dough, a fourth of the yield from the recipe above. Pull the dough out gently or cut its tail with a pair of kitchen shears or a knife. You will shape the dough into a ball by pulling the dough towards the bottom until you have a smooth shape. You will need to do this gently and quickly. Have extra flour on hand in case the dough becomes sticky and you need to reflour your hands. The bottom will probably be very messy but that’s okay. However, if the edges near the bottom are rough, reflour your hands and gently smooth them out.
-
Resting period
Set the loaf onto parchment paper and allow it to rest for about 45 minutes. It will rise only slightly during this time; most of the rising happens in the oven. While the dough is resting, preheat the oven and the cast iron dutch oven. I preheat the oven to 450°F 15 minutes into the rest, then, 20 minutes later, I put in the cast iron dutch oven and its lid and let it preheat for the remaining 10 minutes.
-
Dust and slash
After the resting period, dust the loaf liberally with flour. Using a sharp knife, make 1/2-inch deep cuts into the loaf.
-
Bake into preheated dutch oven
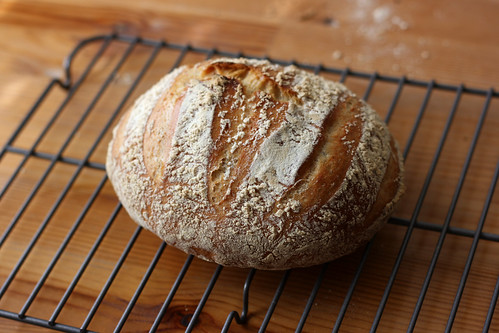
Lift the loaf by lifting the parchment paper and carefully lower it into the preheated dutch oven, parchment paper and all. Reinforce the cuts if needed. Using flame retardant gloves, cover the dutch oven with the preheated lid. Bake for 25 minutes, then remove the lid and bake another 10 to 20 minutes, until the loaf is nicely browned. The precise amount of time will depend on the size of the ball you started out with; check on it after the first 10 minutes of being uncovered (at the 35 minute mark). It is much easier to undercook than overcook the bread because the dough is so wet so don’t worry about needing the whole 45 minutes.
-
Cool
Cool on a cooling rack. The crust will begin to crackle soon after it is exposed to air. Allow the loaf to cool completely before cutting, for at least 2 hours. If you cut it before it cools completely, the bread will become clammy after it cools.
-
Storage
Store bread uncovered at room temperature. Once cut, store cut-side down on a flat surface such as a plate or cutting board. The bread is best on the day it is baked and can be kept uncovered at room temperature, cut-side down, for the first day. After about 24 hours, the crust will begin to harden. The remaining bread can be sliced and frozen in freezer-safe bags and then served as toast.
Process photos
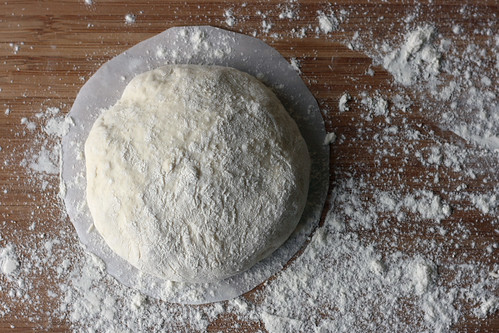
Loaf resting
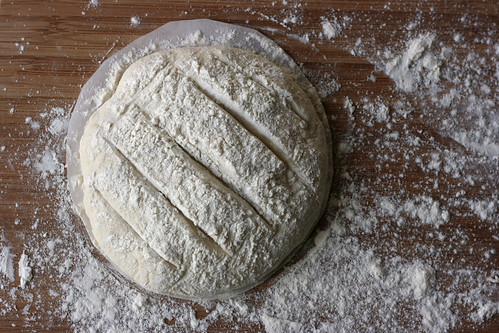
Dusted and slashed loaf

Browned loaf after baking
Cooling

Sliced bread
Tips
Sources of sodium
- Sea salt
Modifications
-
Reduce the sodium
This bread can, according to the authors, be made without any salt whatsoever. I’ve experimented with different amounts and have found the 9 grams to the perfect amount for us. The bread does not taste salty but is not bland.
-
Increase the sodium
If you’re not counting your sodium intake, the authors recommend using between 17 to 25 grams of salt in their book.
-
Timing
The authors recommend baking a 1 pound loaf for 30-35 minutes using their method of baking it on a baking stone with a steaming method. I’ve never baked a loaf for less than 40 minutes in the cast iron dutch oven, in part because the bread is not brown enough after the recommended times. I’ve found that loaves that are slightly under 1 pound generally take 40 minutes and loaves that are around 1 pound or a little more generally take 45-50 minutes. (I measure them at the beginning of the resting period, after I’ve formed them and placed them onto the parchment paper.) But the crust is always very crunchy, which I love. If you’d prefer a less crunchy crust and are baking the bread in a cast iron dutch oven, time it so that you bake the bread covered for the first two-thirds of the baking time and then uncovered for the last third.
-
Other flours
If you want to use other flours, you may need to compensate by changing the amount of water needed. See my previously posted light whole wheat dough recipe. There are suggestions in the book from which this recipe is adapted
for other recipes.
Equipment
The only tools that I need when baking bread are my 9-inch cast iron dutch oven, a measuring scale, and a cooling rack. See the tips section of the older bread recipe post for a discussion on other tools you might want for bread-making.
Did you make this?
- If you recreate this recipe, I’d love to know! Leave a comment here and tag @alickofsalt on social media.

Pingback: Low-sodium light whole wheat bread | A lick of salt
Pingback: Homemade pizza with crispy crust | A lick of salt
Pingback: Spicy lentil soup with sausage | A lick of salt
Pingback: Zucchini Farro Fritters with a Fried Egg | A lick of salt
Pingback: California veggie melt sandwich | A lick of salt